To keep your data model up to date, you must set up a processing schedule, either from Model or from the Content Explorer.
Open the New Schedule Window
To open the New Schedule window:
- In Model: click the Schedule button from the Data Flow or Data Model ribbon
- In the Content Explorer: find the required model definition item, open its Actions Panel, and switch to the Scheduling view
The alternative to scheduling a data model is to directly query the datasource. For a list of datasources that can be directly queried, click here.
Important: This feature is not available in the Community Edition.
Add a New Schedule
STEP 1
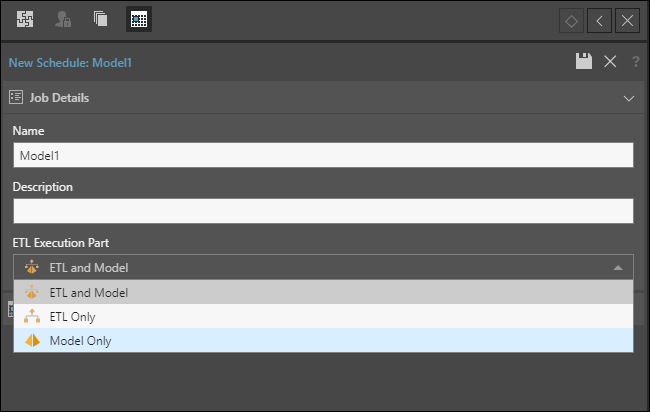
In Job Details, add a name and description for the job, and choose if both the ETL and the Model should be executed, or only the ETL, or only the Model:

STEP 2
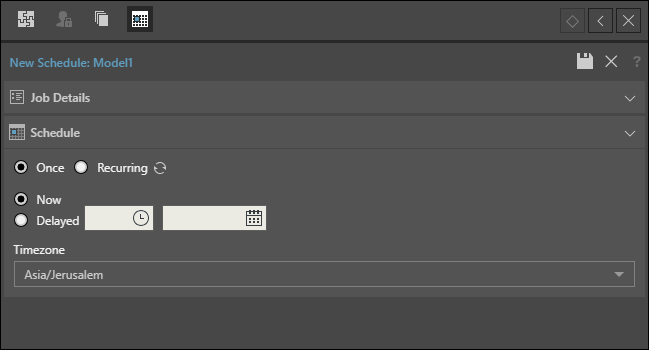
Under Schedule, select if the scheduling job should run once, or on a recurring basis. If you select Once, then select when you want the job to run - either immediately, or at a specified time and date. Lastly, set the time zone.

STEP 3
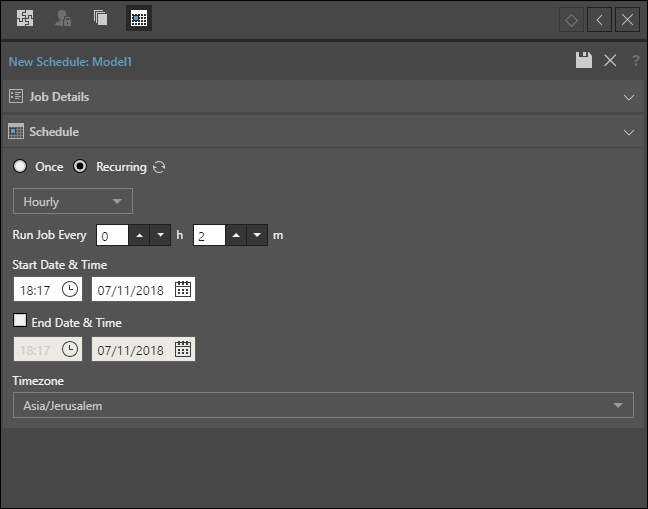
If you choose a recurring schedule, then select the frequency of the job (hourly, daily, weekly, or monthly). Next, enter the start date and time (you can also enter an end date and time if relevant).
Finally, choose the time zone.

STEP 4
Next, save the job by clicking the Save icon. If saved successfully, you'll see a confirmation.

Edit a Scheduled Job
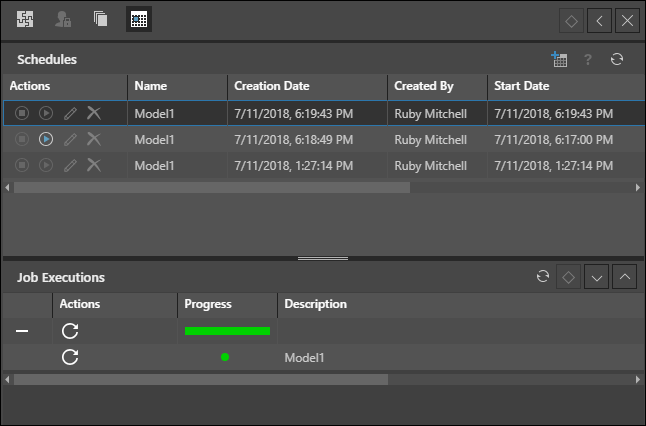
To edit a scheduled job, open the Schedules panel from the model's Actions Panel in the Content Explorer, and under actions select Stop, Start, Edit, or Delete.

You can also click on a schedule that was run to view its Job Executions:
